Tuesday, July 13, 2010

Workout of the Day - Strength Training for Sexiness

Workout of the Day - Strength Training for Sexiness with Sexy Back Boot Camps

Click on picture below to see the workout.

Labels: , , , , , , ,

Saturday, June 5, 2010

How Does Strength Training Rev Up Your Weight Loss Efforts?

Strength Training

By Cassandra Forsythe-Pribanic, PhD, RD, CSCS

Q) I've heard that strength training increases my metabolism. How does it do that and will that help me lose weight?


A) Strength training, which involves using weights, bands, kettlebells or other forms of resistance that challenge your body to work harder than it does in everyday life, definitely does increase your metabolic rate. However, so does endurance exercise (such as running). The difference is how long and how much these activities boost your metabolism that really has an impact on your overall ability to lose body fat and/or decrease your weight.

Just so we’re all on the same page, let’s talk about the components of our metabolism:

First we have our resting metabolic rate, or RMR. This is the energy needed (quantified in calories) to keep our bodies alive – our heart beating, our lungs breathing, etc. Your RMR makes up about 60 to 80 percent of our total metabolic rate. The variation in RMR is due to individual differences among people, the foods we consume, and the activity we engage in which can directly change RMR.

Second we have the Thermic Effect of Activity, or TEA. The more active you are, the more your total metabolic rate will be increased. TEA includes all activity from mowing your lawn (with a push mower, that is), to playing basketball, to walking across the room. It’s not just structured activity, but also the activities that we engage in every day to live our lives.

Third, we have the Thermic Effect of Feeding, or TEF. This is the amount of energy expended to eat and digest food and use those nutrients to create more energy.

So our metabolism, known as total energy expenditure (TEE) = RMR + TEA + TEF. Each component is different for each person, resulting in unique metabolic rates.

Strength training increases our TEE by elevating the amount of calories expended in activity (TEA). The harder you strength train, the greater the amount of calories you burn through exercise. In turn, if your food intake does not highly exceed your needs and consists of quality choices, you will lose weight and body fat.

Interestingly, strength training also increases the amount of calories expended in your RMR. The reason it does this is by increasing the amount of lean muscle mass you carry, which requires more energy to maintain and repair than fat tissue.

Both strength training and endurance exercise will increase your energy expenditure at the time of activity, and for a few hours afterwards, when they are conducted at the same intensity (you all have experienced that increase in hunger after a good workout, whether it be strength or cardio work).

However, strength training is unique in that if you perform multiple sets of a challenging weight to failure, scientists have shown that the energy expended afterwards, known as EPOC (excess post-exercise oxygen consumption) can be elevated for 24-36 hours. Some people call this the “Afterburn” effect of serious strength training.

Overall, strength training can boost your metabolism, but it has to be more challenging than activities you do every day. You can’t expect 3lb dumbbells to make much difference to your metabolic rate if your children (that you carry around) weigh more, or your grocery bags are heavier. Your body needs to remember that strength training requires “strength” so you have to load your exercises accordingly. Otherwise your body won’t get the challenge it needs to build muscle, lose fat and look better in your clothes – and that’s what we’re all looking for, right?

The Simpler Way: New METABOLISM

Prograde’s new METABOLISM dietary supplement is intended to serve as a simple tool for helping you “exercise” your metabolism, raise your calorie-burning rate and get you into the negative fat balance territory where fat loss actually occurs.


Every Prograde products comes with a 60-day, 100% money-back guarantee.

You've got nothing to lose (and everything to gain) by putting your trust in Prograde Nutrition!

Place your order toll free today! 1-888-9GETPRO (1-888-943-8776) Mon-Fri 9am-7pm EST

Or use our 100% secure online ordering system below.

CLICK HERE TO GO TO ORDER PAGE <==

===
Twork it out!

Coach Kri Chay
Sexy Back Boot Camps in Kansas City

Labels: , , , , , ,

Friday, October 30, 2009

Sexy Worldwide Charity Boot Camp Strength Intermediate

Sexy Worldwide Charity Boot Camp Strength Intermediate


First Ever Worldwide Charity Boot Camp Workout with Sexy Back Boot Camp for Charity. Kri Chay, owner of Sexy Back Boot Camps, Belton Lubas of Seattle, WA with Strong and Sexy Boot Camps, Sophin Sarin of Des Moines, IA with Twork It Out Fitness Boot Camps and Val Fujii of Folsom, CA with Superwomen Boot Camp to form a nationwide charity boot camp to raise funds to assist the thousands of victims of the recent Philippines and American Samoa disasters.

Labels: , , , , , , , , , , , , , , , ,

Tuesday, May 5, 2009

Best Core Exercise Ever ==> Push-ups Part 2

The Official Push-up Boot Camp Program

Photobucket

Sexy Step#1- Find your current Push-up Total

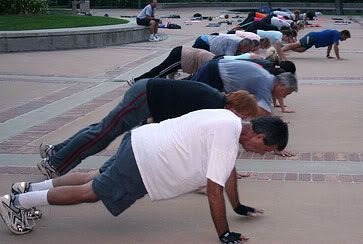
Assuming a regular floor push-up position, perform as many reps as possible with perfect form and technique in 60 seconds. Be sure to come as least one to two inches from the ground with your chest to count as a full rep. Record your rep total and then take 60 seconds of rest (no longer). Repeat by performing one more set of max reps in 60 seconds and then record your second set total. Add both your set one and set two totals and then divide by two. This is your current push-up total.

Sexy Step#2- Follow the custom push-up boot camp program based on your current push-up total:

The following program will systematically take you from level I to level IV six weeks at a time (not including a week of rest between levels). We will be testing again after three weeks, and then doing it again after the next phase of training. It is important to note that you must be following the appropriate fat loss training (total body strength circuits and cardio interval training) and nutrition plan to lose unwanted body fat that is weighing you down and literally halting your push-up totals in its tracks. In addition, be sure to change up the selected push-up variation at each and every strength workout to best prevent training plateaus. Here’s an example of how to switch things up for one week of training:

Day1- Close-Grip Push-up Variation (to emphasize the triceps and front shoulders to improve push-up lockout)

Day2- Loaded/Band-Resisted Push-up Variation (to improve strength and thus make it easier to perform body weight push-ups) * We did these yesterday! *

Day3- Stability Ball Push-up Variation- Hands Ball (to build trunk and scapular strength stability to prevent injury and maximize force output)


Photobucket

Remember, the better you get at every push-up variation the better you will get at regular push-ups. Once you achieve a current push-up total of 30 reps or more, you will notice the focus now will be on getting stronger by mastering the 1-arm push-up. Improving maximum strength automatically improves your muscular endurance, though it doesn’t work the same the other way around.

Please note that you should only follow this program if you have healthy shoulders. In addition, since you will be performing extra pushing movements, it is critical to add in some scapular retraction and depression work to prevent unwanted strength imbalances. Please note the addition of a certain amount of reps of Body Weight Prisoner Squat or Y Squats (arms ups) following each set of push-ups for your “Extra Push-up Work” to achieve this end. The Body Weight Prisoner Squat or Y Squat was selected because it simultaneously works your upper back and opens up your chest while working your lower body to boost metabolism. Plus, it’s an exercise you can do anywhere. Lastly, the “Extra Push-up Work” is best performed throughout the day to be fresh and allow for full recovery.

Level Current Push-up Total Push-up Protocol
Level I 0-1 - Main Strength Workout: Perform max reps or a max hold for time for a different push-up variation at each of 3 strength workouts per week with ideally a day of rest between workouts

- Extra Push-up Work: Perform 5 sets per day of negative push-ups with the following weekly progressions Monday through Friday (weekends off):

Week1- 5 sets of 2 reps of 5-second negatives
Week2- 5 sets of 3 reps of 6-second negatives
Week3- 5 sets of 4 reps of 7-second negatives
Week4- 5 sets of 5 reps of 8-second negatives
Week5- 5 sets of 5 reps of 9-second negatives
Week6- 5 sets of 5 reps of 10-second negatives

- Follow each set of push-ups with 10 reps of Body Weight Prisoner or Y Squats

Level II 2-5 - Main Strength Workout: Perform max reps or a max hold for time for a different push-up variation at each of 3 strength workouts per week with ideally a day of rest between workouts

- Extra Push-up Work: Perform 5 sets per day of regular floor push-ups with the following weekly progressions Monday through Friday (weekends off):

Week1- 5 sets of 1 rep
Week2- 5 sets of 2 reps
Week3- 5 sets of 3 reps
Week4- 5 sets of 4 reps
Week5- 5 sets of 5 reps
Week6- 5 sets of 6 reps

- Follow each set of push-ups with 20 reps of Body Weight Prisoner or Y Squats

Level III 6-12 - Main Strength Workout: Perform max reps or a max hold for time for a different push-up variation at each of 3 strength workouts per week with ideally a day of rest between workouts

- Extra Push-up Work: Perform 5 sets per day of regular floor push-ups with the following weekly progressions Monday through Friday (weekends off):

Week1- 5 sets of 5 reps
Week2- 5 sets of 6 reps
Week3- 5 sets of 7 reps
Week4- 5 sets of 8 reps
Week5- 5 sets of 9 reps
Week6- 5 sets of 10 reps

- Follow each set of push-ups with 30 reps of Body Weight Prisoner or Y Squats

Level IV 13-20 - Main Strength Workout: Perform max reps or a max hold for time for a different push-up variation at each of 3 strength workouts per week with ideally a day of rest between workouts

- Extra Push-up Work: Perform 5 sets per day of regular floor push-ups with the following weekly progressions Monday through Friday (weekends off):

Week1- 5 sets of 10 reps
Week2- 5 sets of 12 reps
Week3- 5 sets of 14 reps
Week4- 5 sets of 16 reps
Week5- 5 sets of 18 reps
Week6- 5 sets of 20 reps

- Follow each set of push-ups with 40 reps of Body Weight Prisoner or Y Squats

Level V 21-30 - Main Strength Workout: Perform max reps or a max hold for time for a different push-up variation at each of 3 strength workouts per week with ideally a day of rest between workouts

- Extra Push-up Work: Perform 5 sets per day of regular floor push-ups with the following weekly progressions Monday through Friday (weekends off):

Week1- 5 sets of 20 reps
Week2- 5 sets of 22 reps
Week3- 5 sets of 24 reps
Week4- 5 sets of 26 reps
Week5- 5 sets of 28 reps
Week6- 5 sets of 30 reps

- Follow each set of push-ups with 50 reps of Body Weight Prisoner or Y Squats

Level VI 31+ - Main Strength Workout: Perform max reps or a max hold for time for a different push-up variation at each of 3 strength workouts per week with ideally a day of rest between workouts

- Extra Push-up Work: Perform 5 sets per day of a 1-arm push-ups variation with the following weekly progressions Monday through Friday (weekends off). Progress from stage 1 to stage 3 in choosing the appropriate 1-arm push-up variation:

Week1- 5 sets of 1 rep
Week2- 5 sets of 2 reps
Week3- 5 sets of 3 reps
Week4- 5 sets of 4 reps
Week5- 5 sets of 5 reps
Week6- 5 sets of 6 reps

Stage1- Modified 1-Arm Push-ups on Knees/Inclined

Stage2- Regular 1-Arm Push-ups 5-secondNegatives

Stage3- Regular 1-Arm Push-ups

- Follow each set of push-ups with 60 reps of Body Weight Prisoner or Y Squats


Sexy Step#3- Re-Test Your Current Push-up Total

At the end of each 6-week training block, take 5 full days of rest before re-testing your new push-up total exactly as previously outlined in step one. Record your new push-up total and then take the rest of the week off for recovery before moving on to the next level of push-up boot camp.

Well, you now know everything you need to know to safely and effectively perform more push-ups than 99+% of the world. Remember, the leaner you are the better you will be at push-ups and the more push-ups you can do, the better you will look- time to master the push-up!

Twork it out!

Please leave a comment and let me know how many push-ups you're gonna rock out in three weeks!! Let's put your money where your mouth is!! :)

Labels: , , , ,

Tuesday, April 28, 2009

How To Do The Best Core Exercise Ever => Push-ups Part 1

The Push-up. I love push-ups. They can be done anywhere at anytime. You can do them on the ground, on a ball, on a wall, and even suspended in water. It is probably the most popular exercise of all time. But being popular doesn’t necessarily mean being well liked! In fact, I think it is safe to say that the majority of people really HATE push-ups. More specifically, the push-up tends to be the undying nemesis for people who carry extra body weight and for most females who feel they do not have the upper strength to ever be able to do anything but “girl push-ups” or modified push-ups on the knees.

Photobucket

The goal of this article is to address everything you need to know about performing the push-up with proper form in addition to learning how to do more push-ups ASAP. Remember, people only hate what they are not good at it. In other words, I am confident that though you may currently hate push-ups, by following this program you will finally unveil your true push-up potential. And though you may never be madly in love with push-up, you’ll at least be able to stomach them!

Benefits of Push-ups

Right next to pull-ups, a push-up is the greatest upper body exercise of all time. In fact, I believe push-ups to be one of the best total body exercises around.

Push-ups work primarily your chest, triceps, and front shoulders. However they also place a great demand on your core strength and stability. After all, your spinal stabilizers (transverse abdominis and spinal erectors) need to have the endurance to maintain that critical straight-line position throughout the duration of your push-ups for optimal safety and performance. In addition, push-ups engage your scapular muscles (shoulder blades) in a way that most pushing exercises do not, thus providing some much needed mid and upper back work that most trainees are missing out on. Furthermore, maintaining the proper push-up position requires that you tense and engage every muscle on the front side of your body from your feet to your front shoulders. Heck, if you squeeze your glutes (which you should as this helps protect your lower back), you even get your booty involved!

Photobucket

Finally, push-ups are the ultimate anywhere, anytime exercise that requires nothing but your body weight and space the size of your frame to perform.

How to Perform a Perfect Push-up

Though nearly everyone to grace this earth has attempted a push-up at some time in his or her life, the vast majority of people have never performed a full range of motion floor push-up with perfect form and technique. If this describes, don’t sweat it. It’s not your fault if no one ever taught you how to perform push-ups properly. I mean, haven’t we all heard this at some point before from an authority figure, whether it be an old school athletic coach or gym teacher:

“Alright 100 push-ups now! No, not like that, get lower! What are you, weak? It’s just a push-up! If you don’t do them right, we’re going to do them all day! I’ve got the time!”

Photobucket

But, what’s done is done. And though it was be a blast to kick the tar out of our former punishers, let’s focus on doing things right for ourselves. Below is a complete list of technique and coaching points regarding how to perform a perfect push-up:

- Simultaneously tuck your elbows to your sides and pull your shoulders blades down and back: It’s critical to keep your elbows close to your ribcage while performing push-ups. Letting your elbows “sprawl” away from your torso puts your rotator cuff at a much greater risk for injury. In addition, since most of us are so upper trap dominant, we tend to shrug our shoulders during push-ups. This scapular elevation can lead to clicking and grinding of the shoulder (known as shoulder impingement syndrome). To avoid these pitfalls, visualize trying to hug your elbows to your ribcage while cracking a nut between your shoulder blades during all push-ups.

- Simultaneously suck in your gut and brace your abs: As mentioned earlier, the push-up is a great core exercise that requires good muscular endurance for your deep spinal stabilizers. By pulling your navel to your spine and bracing your abs as if you we about to be kicked in the gut, you will best activate those key core muscles while performing push-ups.

- Simultaneously tense your thighs and squeeze your glutes: The straighter your legs during the push-up the more stable you will be. This is easily accomplished by tensing your thighs throughout the exercise. Furthermore, tense your butt cheeks- this helps relax overactive hip flexors, thus alleviating unnecessary strain on the lower back.

Photobucket

- Power breathing: In general, seek to focus on inhaling during the lowering portion of the push-up and then forcefully exhaling during the lifting portion of the push-up. By filling your belly with air during the lowering portion of the push-up your make it easier to stabilize your spine, meaning that your core remains locked in thus allowing for a smooth and seamless transition from the down position to the up position.

- Spread your fingers: Many people complain of wrist pain while they do push-ups. This usually stems from a combination of a lack of mobility at the wrist joint and a lack of flexibility of the forearm flexors and extensors. Plus, many people simply have weak wrists from a lack of weight-bearing exercises in their daily routine. Think about it- we do not do as much as we used to do with our hands and are rarely in a position where our wrists our supporting our entire body weight (besides when doing push-ups). One way to take pressure off of your wrists during push-ups is to focus on spreading your fingers as far apart as possible. This expands the surface area and thus dissipates some of the excess strain on the wrists. Furthermore, doing fist push-ups or push-ups with your hands on a dumbbell (or push-up handles) tends to significantly alleviate if not eliminate any unwanted wrist issues. This neutral grip allows you get all of the benefits of push-ups so that your wrists do not continue to be the biggest limiting factor for your push-up goals. In addition, the neutral grip also makes it easier to keep your helps tucked to your sides and shoulders down and back for optimal shoulder safety.

- Be flat as a diving board: Throughout the entire movement, the key is to maintain a straight line from the heels through the shoulders. You must not let your hips sag as this will put undue strain on your lower back in the form of hyperextension. Furthermore, you must avoid raising or “piking” your hips because this not only takes a way much needed core work, but also results in a rounding of the upper back that potentially results in unwanted shoulder issues (impingement, rotator cuff strains, etc.).

Labels: , , , ,