How To Do The Best Core Exercise Ever => Push-ups Part 1
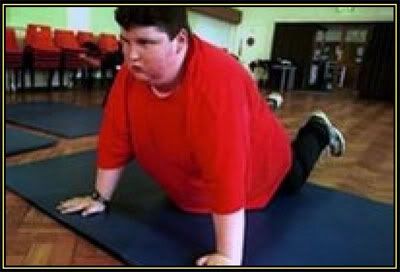
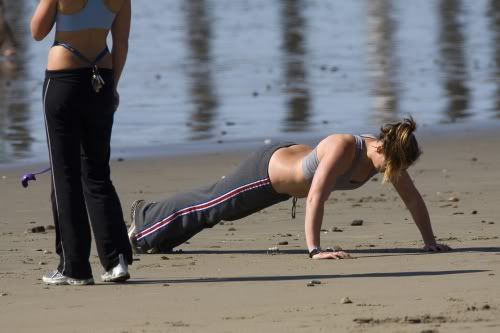
The Push-up. I love push-ups. They can be done anywhere at anytime. You can do them on the ground, on a ball, on a wall, and even suspended in water. It is probably the most popular exercise of all time. But being popular doesn’t necessarily mean being well liked! In fact, I think it is safe to say that the majority of people really HATE push-ups. More specifically, the push-up tends to be the undying nemesis for people who carry extra body weight and for most females who feel they do not have the upper strength to ever be able to do anything but “girl push-ups” or modified push-ups on the knees.

The goal of this article is to address everything you need to know about performing the push-up with proper form in addition to learning how to do more push-ups ASAP. Remember, people only hate what they are not good at it. In other words, I am confident that though you may currently hate push-ups, by following this program you will finally unveil your true push-up potential. And though you may never be madly in love with push-up, you’ll at least be able to stomach them!
Benefits of Push-ups
Right next to pull-ups, a push-up is the greatest upper body exercise of all time. In fact, I believe push-ups to be one of the best total body exercises around.
Push-ups work primarily your chest, triceps, and front shoulders. However they also place a great demand on your core strength and stability. After all, your spinal stabilizers (transverse abdominis and spinal erectors) need to have the endurance to maintain that critical straight-line position throughout the duration of your push-ups for optimal safety and performance. In addition, push-ups engage your scapular muscles (shoulder blades) in a way that most pushing exercises do not, thus providing some much needed mid and upper back work that most trainees are missing out on. Furthermore, maintaining the proper push-up position requires that you tense and engage every muscle on the front side of your body from your feet to your front shoulders. Heck, if you squeeze your glutes (which you should as this helps protect your lower back), you even get your booty involved!

Finally, push-ups are the ultimate anywhere, anytime exercise that requires nothing but your body weight and space the size of your frame to perform.
How to Perform a Perfect Push-up
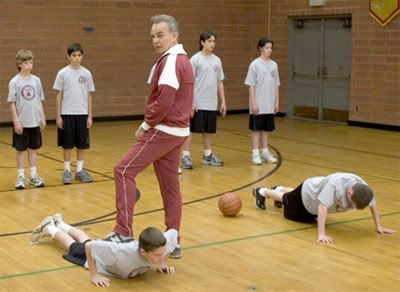
Though nearly everyone to grace this earth has attempted a push-up at some time in his or her life, the vast majority of people have never performed a full range of motion floor push-up with perfect form and technique. If this describes, don’t sweat it. It’s not your fault if no one ever taught you how to perform push-ups properly. I mean, haven’t we all heard this at some point before from an authority figure, whether it be an old school athletic coach or gym teacher:
“Alright 100 push-ups now! No, not like that, get lower! What are you, weak? It’s just a push-up! If you don’t do them right, we’re going to do them all day! I’ve got the time!”

But, what’s done is done. And though it was be a blast to kick the tar out of our former punishers, let’s focus on doing things right for ourselves. Below is a complete list of technique and coaching points regarding how to perform a perfect push-up:
- Simultaneously tuck your elbows to your sides and pull your shoulders blades down and back: It’s critical to keep your elbows close to your ribcage while performing push-ups. Letting your elbows “sprawl” away from your torso puts your rotator cuff at a much greater risk for injury. In addition, since most of us are so upper trap dominant, we tend to shrug our shoulders during push-ups. This scapular elevation can lead to clicking and grinding of the shoulder (known as shoulder impingement syndrome). To avoid these pitfalls, visualize trying to hug your elbows to your ribcage while cracking a nut between your shoulder blades during all push-ups.
- Simultaneously suck in your gut and brace your abs: As mentioned earlier, the push-up is a great core exercise that requires good muscular endurance for your deep spinal stabilizers. By pulling your navel to your spine and bracing your abs as if you we about to be kicked in the gut, you will best activate those key core muscles while performing push-ups.
- Simultaneously tense your thighs and squeeze your glutes: The straighter your legs during the push-up the more stable you will be. This is easily accomplished by tensing your thighs throughout the exercise. Furthermore, tense your butt cheeks- this helps relax overactive hip flexors, thus alleviating unnecessary strain on the lower back.

- Power breathing: In general, seek to focus on inhaling during the lowering portion of the push-up and then forcefully exhaling during the lifting portion of the push-up. By filling your belly with air during the lowering portion of the push-up your make it easier to stabilize your spine, meaning that your core remains locked in thus allowing for a smooth and seamless transition from the down position to the up position.
- Spread your fingers: Many people complain of wrist pain while they do push-ups. This usually stems from a combination of a lack of mobility at the wrist joint and a lack of flexibility of the forearm flexors and extensors. Plus, many people simply have weak wrists from a lack of weight-bearing exercises in their daily routine. Think about it- we do not do as much as we used to do with our hands and are rarely in a position where our wrists our supporting our entire body weight (besides when doing push-ups). One way to take pressure off of your wrists during push-ups is to focus on spreading your fingers as far apart as possible. This expands the surface area and thus dissipates some of the excess strain on the wrists. Furthermore, doing fist push-ups or push-ups with your hands on a dumbbell (or push-up handles) tends to significantly alleviate if not eliminate any unwanted wrist issues. This neutral grip allows you get all of the benefits of push-ups so that your wrists do not continue to be the biggest limiting factor for your push-up goals. In addition, the neutral grip also makes it easier to keep your helps tucked to your sides and shoulders down and back for optimal shoulder safety.
- Be flat as a diving board: Throughout the entire movement, the key is to maintain a straight line from the heels through the shoulders. You must not let your hips sag as this will put undue strain on your lower back in the form of hyperextension. Furthermore, you must avoid raising or “piking” your hips because this not only takes a way much needed core work, but also results in a rounding of the upper back that potentially results in unwanted shoulder issues (impingement, rotator cuff strains, etc.).

The goal of this article is to address everything you need to know about performing the push-up with proper form in addition to learning how to do more push-ups ASAP. Remember, people only hate what they are not good at it. In other words, I am confident that though you may currently hate push-ups, by following this program you will finally unveil your true push-up potential. And though you may never be madly in love with push-up, you’ll at least be able to stomach them!
Benefits of Push-ups
Right next to pull-ups, a push-up is the greatest upper body exercise of all time. In fact, I believe push-ups to be one of the best total body exercises around.
Push-ups work primarily your chest, triceps, and front shoulders. However they also place a great demand on your core strength and stability. After all, your spinal stabilizers (transverse abdominis and spinal erectors) need to have the endurance to maintain that critical straight-line position throughout the duration of your push-ups for optimal safety and performance. In addition, push-ups engage your scapular muscles (shoulder blades) in a way that most pushing exercises do not, thus providing some much needed mid and upper back work that most trainees are missing out on. Furthermore, maintaining the proper push-up position requires that you tense and engage every muscle on the front side of your body from your feet to your front shoulders. Heck, if you squeeze your glutes (which you should as this helps protect your lower back), you even get your booty involved!

Finally, push-ups are the ultimate anywhere, anytime exercise that requires nothing but your body weight and space the size of your frame to perform.
How to Perform a Perfect Push-up
Though nearly everyone to grace this earth has attempted a push-up at some time in his or her life, the vast majority of people have never performed a full range of motion floor push-up with perfect form and technique. If this describes, don’t sweat it. It’s not your fault if no one ever taught you how to perform push-ups properly. I mean, haven’t we all heard this at some point before from an authority figure, whether it be an old school athletic coach or gym teacher:
“Alright 100 push-ups now! No, not like that, get lower! What are you, weak? It’s just a push-up! If you don’t do them right, we’re going to do them all day! I’ve got the time!”

But, what’s done is done. And though it was be a blast to kick the tar out of our former punishers, let’s focus on doing things right for ourselves. Below is a complete list of technique and coaching points regarding how to perform a perfect push-up:
- Simultaneously tuck your elbows to your sides and pull your shoulders blades down and back: It’s critical to keep your elbows close to your ribcage while performing push-ups. Letting your elbows “sprawl” away from your torso puts your rotator cuff at a much greater risk for injury. In addition, since most of us are so upper trap dominant, we tend to shrug our shoulders during push-ups. This scapular elevation can lead to clicking and grinding of the shoulder (known as shoulder impingement syndrome). To avoid these pitfalls, visualize trying to hug your elbows to your ribcage while cracking a nut between your shoulder blades during all push-ups.
- Simultaneously suck in your gut and brace your abs: As mentioned earlier, the push-up is a great core exercise that requires good muscular endurance for your deep spinal stabilizers. By pulling your navel to your spine and bracing your abs as if you we about to be kicked in the gut, you will best activate those key core muscles while performing push-ups.
- Simultaneously tense your thighs and squeeze your glutes: The straighter your legs during the push-up the more stable you will be. This is easily accomplished by tensing your thighs throughout the exercise. Furthermore, tense your butt cheeks- this helps relax overactive hip flexors, thus alleviating unnecessary strain on the lower back.

- Power breathing: In general, seek to focus on inhaling during the lowering portion of the push-up and then forcefully exhaling during the lifting portion of the push-up. By filling your belly with air during the lowering portion of the push-up your make it easier to stabilize your spine, meaning that your core remains locked in thus allowing for a smooth and seamless transition from the down position to the up position.
- Spread your fingers: Many people complain of wrist pain while they do push-ups. This usually stems from a combination of a lack of mobility at the wrist joint and a lack of flexibility of the forearm flexors and extensors. Plus, many people simply have weak wrists from a lack of weight-bearing exercises in their daily routine. Think about it- we do not do as much as we used to do with our hands and are rarely in a position where our wrists our supporting our entire body weight (besides when doing push-ups). One way to take pressure off of your wrists during push-ups is to focus on spreading your fingers as far apart as possible. This expands the surface area and thus dissipates some of the excess strain on the wrists. Furthermore, doing fist push-ups or push-ups with your hands on a dumbbell (or push-up handles) tends to significantly alleviate if not eliminate any unwanted wrist issues. This neutral grip allows you get all of the benefits of push-ups so that your wrists do not continue to be the biggest limiting factor for your push-up goals. In addition, the neutral grip also makes it easier to keep your helps tucked to your sides and shoulders down and back for optimal shoulder safety.
- Be flat as a diving board: Throughout the entire movement, the key is to maintain a straight line from the heels through the shoulders. You must not let your hips sag as this will put undue strain on your lower back in the form of hyperextension. Furthermore, you must avoid raising or “piking” your hips because this not only takes a way much needed core work, but also results in a rounding of the upper back that potentially results in unwanted shoulder issues (impingement, rotator cuff strains, etc.).


0 Comments:
Post a Comment
Subscribe to Post Comments [Atom]
<< Home